Difference between revisions of "Contact person:Registering persons of your organisation"
| (14 intermediate revisions by 2 users not shown) | |||
| Line 1: | Line 1: | ||
= Registering persons of your organization = | = Registering persons of your organization = | ||
| + | ! There is NO information/qualification required from the contactperson regarding his/her registration. You can go directly add your employee(s). | ||
== Step 1: Add a person == | == Step 1: Add a person == | ||
| Line 14: | Line 15: | ||
[[File: afb5 person information.png |thumb|500px|left|Figure 3. Person information]]<br clear=all> | [[File: afb5 person information.png |thumb|500px|left|Figure 3. Person information]]<br clear=all> | ||
| + | <strong>An Individual Worker (Dutch ZZP-er) needs to be registered as an employee belonging to your organisation. If the person is already known in our Contractor Portal, please ask the him to send a mail to: [email protected] to be registered at the correct company. Also mention the old and new company in that mail.</strong> | ||
=== Additional information === | === Additional information === | ||
| Line 86: | Line 88: | ||
[[File: afb8 go to person overview.png |thumb|500px|left|Figure 5. Person created popup]]<br clear=all> | [[File: afb8 go to person overview.png |thumb|500px|left|Figure 5. Person created popup]]<br clear=all> | ||
| − | |||
| − | |||
| − | |||
| − | |||
| − | |||
| − | |||
| − | |||
| − | |||
| − | |||
| − | |||
| − | |||
| − | |||
| − | |||
| − | |||
| − | |||
| − | |||
| − | |||
== Step 2: Edit the person == | == Step 2: Edit the person == | ||
| Line 214: | Line 199: | ||
[[File: afb22 employers statement.png|thumb|500px|left|Figure 19. Employers statement]] <br clear=all> | [[File: afb22 employers statement.png|thumb|500px|left|Figure 19. Employers statement]] <br clear=all> | ||
| − | Upload the employers statement by clicking '' | + | Upload the employers statement by clicking '''BROWSE''' and click '''Submit''' |
[[File: afb18 submit succeeded.png|thumb|500px|left|Figure 20. Submit succeeded]] <br clear=all> | [[File: afb18 submit succeeded.png|thumb|500px|left|Figure 20. Submit succeeded]] <br clear=all> | ||
| Line 223: | Line 208: | ||
===== Work permit ===== | ===== Work permit ===== | ||
| − | Enter the required information and click ''Submit''. | + | When required to do so, please upload your work permit. (system will decide based on the given input). |
| + | Enter the required information and click '''Submit'''. | ||
[[File: afb23 work permit.png|thumb|500px|left|Figure 20. Work permit]] <br clear=all> | [[File: afb23 work permit.png|thumb|500px|left|Figure 20. Work permit]] <br clear=all> | ||
| Line 241: | Line 227: | ||
==== Tab Notes ==== | ==== Tab Notes ==== | ||
| − | You can add any additional notes/information. This information is visible for ZR. | + | You can add any additional notes/information. This information is visible for ZR Guards. |
[[File: afb25 notes.png|thumb|500px|left|Figure 22. Notes]] <br clear=all> | [[File: afb25 notes.png|thumb|500px|left|Figure 22. Notes]] <br clear=all> | ||
| Line 250: | Line 236: | ||
[[File: afb26 save.png|thumb|500px|left|Figure 23. Confirm changes]] <br clear=all> | [[File: afb26 save.png|thumb|500px|left|Figure 23. Confirm changes]] <br clear=all> | ||
| − | + | Select '''CONFIRM''' to save your changes. | |
| − | CONFIRM | ||
| − | |||
| − | |||
| − | = | + | <span style="color: red; font-weight:bold"> Repeat this procedure for each new person.</span><br> |
| − | |||
| − | |||
Latest revision as of 13:26, 19 September 2024
Contents
Registering persons of your organization
! There is NO information/qualification required from the contactperson regarding his/her registration. You can go directly add your employee(s).
Step 1: Add a person
Click on Persons in the menu to get an overview of persons registered to your organisation.
Click on ADD PERSON, on the right side of the screen.
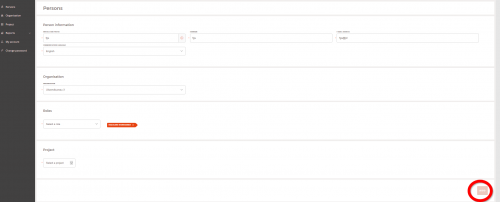
In the screen below, all of the fields under Person information are required. When complete, press 'ADD'.
Note: use simple characters only or western names when entering information, do not use Cyrillic/Polish/Ukrainian etc. characters but western characters.For example:
- Bogusław becomes Boguslaw
- Bożydar becomes Bozydar
- Дэлано becomes Delano
An Individual Worker (Dutch ZZP-er) needs to be registered as an employee belonging to your organisation. If the person is already known in our Contractor Portal, please ask the him to send a mail to: [email protected] to be registered at the correct company. Also mention the old and new company in that mail.
Additional information
E-mail address
There are in fact 3 options for an e-mail-address:
- Use the persons private e-mail address
- Use the persons business e-mail address
- Use a forwarding mail address (fictional mail address ending at @zrcontractor.nl - all mail sent to such e-mail address is forwarded to the contactperson of the company.
Fill in the persons private or business e-mail address only if you're sure the person actually uses this (because a password and other important mails (f.i. on expiration of a personal safety certificate or mandatory training will be sent to this email address).
This e-mail address is very important!
The person must use this e-mail address to:
- To see or adjust his person information.
- To log in for the Helix e-learning site to follow the mandatory e-learnings (f.i. the Safety Instruction Contractors)
It is not allowed to use or create addresses like:
- info@...
- sales@...
- purchasing@...
as these are typically not linked to 1 person.
E-mail forwarding address (fictional)
In case the person doesn't have an email address, you can fill-in a forwarding address to allow you to continue. All email sent to this address will automatically be forwarded to the contactperson(s) of your organisation.
To create a forwarding e-mail address, please use the following format: [initials/prefix].[familyname][birthyear]@zrcontractor.nl. This makes sure the email address is unique (see examples below)
This only applies to employees of your organisation.
Examples:
| Name | Date of birth | Email address |
|---|---|---|
| A.M.P. van der Velden | 05-05-1971 | [email protected] |
| A.de Vries | 26-12-1986 | [email protected] |
| G. Pieterse | 30-07-1992 | [email protected] |
Organisation
This is the name of your organisation (you cannot change this)
Roles
Choose the appropriate role(s)
Be sure to choose the right roles as required qualifications are based on the selected roles.
Translations:
| Dutch | English |
|---|---|
| Reguliere werknemer | Regular employee |
| Buitenlandse medewerker in NL loondienst | Foreign employee working for a Dutch company |
| Contactpersoon Organisatie | Contactperson organisation (don't use this for your workers) |
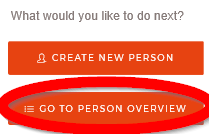
When you are finished press ADD and you see the following pop up, where you can select to create another person or go to the overview of your persons.
Step 2: Edit the person
To continue you now need to edit the person and enter more required information. Click on EDIT PERSON
At the top you can see the persons status at a glance, the user either has access or no access to the ZR site. Below this status the qualifications required for this person to get the site access are shown.
Each tab requires information; fields marked with an asterisk are required.
Tab Personal information
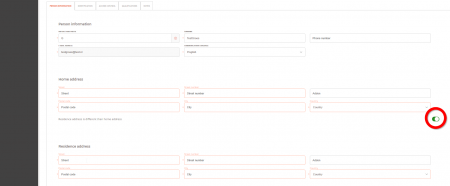
If the home address is not the same as the residence address (eg. staying in a hotel) click the slider next to Residence address is different than home address.
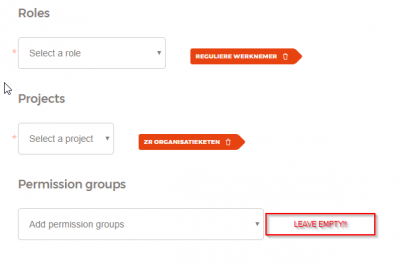
Please make sure the following settings are set for a regular worker (bottom of the tab :
- ROLE: REGULIERE WERKNEMER for regular employees or "BUITENLANDSE WERKNEMER IN NL LOONDIENST" for foreign workers on a Dutch payroll.
- PROJECT: ZR ORGANISATIEKETEN
- PERMISSIONS: none selected
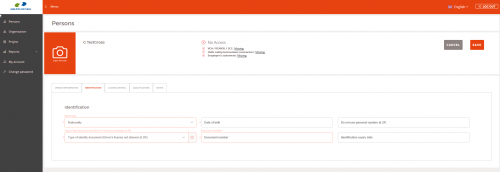
Tab Identification Details
- Do not use the personal number
- Please note that a driver's license is not allowed for identification at ZR.
Tab Access
You can skip this tab.
Tab Qualifications
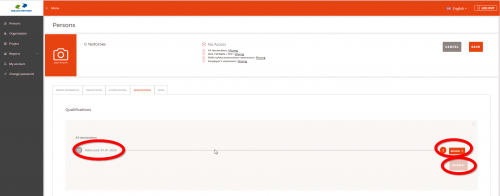
Depending on the persons nationality the Portal shows the required QUALIFICATIONS, such as VCA/SCC, A1, employer’s statement, Helix safety instructions contractors. At the top of the screen you see the required qualifications.
Only qualifications marked with an asterisk (*) are required for access to the site. Other uploaded qualifications will be ignored or rejected.
Some qualifications show an information icon, hovering with your mouse shows additional information:
A1 declaration
Press ADD and the next screen appears:
Answer YES or No to the question: Are you on the payroll within Netherlands.
- When YES you don’t have to add this qualification; press OK
- When NO, press NEXT and note the validity date of the declaration and upload the document.
Press SUBMIT. The pop up SUBMIT SUCCEEDED appears. Press OK.
Note: When you have submitted the qualification, the guard(s) at Zeeland Refinery receive an e-mail to approve the qualification. Once they have approved the qualification, you receive an e-mail with a confirmation.
If information about a qualification is wrong or incomplete, please send an email to: [email protected]
In this mail you ask to disapprove the qualification (which qualification and which person). After the disapproval you will receive a email from [email protected] with confirmation. Now you can add the right or complete qualification
VCA / VCAVOL / SCC
If the person has a Dutch nationality, the VCA document can be searched and found in the national database. Before doing this, make sure the person's last name and date of birth are correctly saved in the system.
If the person is solely going to perform office related tasks and therefore does not have a VCA certificate. Please upload a document stating what kind of office related tasks the user will be performing.
Press ADD VCA/SOG DIPLOMAS AUTOMATICALLY
- If the person is known in the database, the information is automatically displayed and can then be chosen.
- If not, information has to be uploaded manually.
- You must follow the procedure. When all the required information has been entered, press SUBMIT
Note: When you have submitted the qualification, the guard(s) at Zeeland Refinery receive an e-mail to approve the qualification. Once they have approved the qualification, you receive an e-mail with confirmation.
If information about a qualification is wrong or incomplete, please send an email to: [email protected]
In this mail you ask to disapprove the qualification (which qualification and persons name). After the disapproval you will receive an email from [email protected] with confirmation. Now you can add the right or complete qualification
Helix Safety instruction contractors
The person has to log in onto Helix Safety Instructions website with the e-mail address known in the Contractor Portal.
If the exams have been completed successfully, the results are automatically saved in the Contractor Portal for the mentioned qualifications
Any person who does not have a valid Helix Safety Instruction Contractors, must have followed this before starting to work at Zeeland Refinery.
Click here for the instructions regarding how to follow the Helix safety instructions
Employer’s statement
Only required when the person has been assigned the role Buitenlandse medewerker in NL loondienst
Upload the employers statement by clicking BROWSE and click Submit
Note:
When you have submitted the qualification, the guard(s) at Zeeland Refinery receive an e-mail to approve the qualification.
Once they have approved the qualification, you receive an e-mail with confirmation.
Work permit
When required to do so, please upload your work permit. (system will decide based on the given input). Enter the required information and click Submit.
After uploading the file you have to approve the upload to submit.
Note: When you have submitted the qualification, the guard(s) at Zeeland Refinery receive an e-mail to approve the qualification. Once they have approved the qualification, you receive an e-mail with confirmation.
If information about a qualification is wrong or incomplete, please send an email to: [email protected]
In this mail you ask to disapprove the qualification (which qualification and persons name). After the disapproval you will receive an email from [email protected] with confirmation. Now you can add the right or complete qualification
Tab Notes
You can add any additional notes/information. This information is visible for ZR Guards.
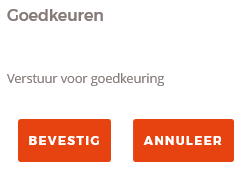
Once ALL the information and required documents have been submitted, press Save
Select CONFIRM to save your changes.
Repeat this procedure for each new person.


